Legacy S-URL: How to Activate Public Share Link & S-URL
This page describes how to set up Legacy S-URL using a force.com site. This allows you to create Public Share links to share files that users can open or download only (no upload, delete or edit metadata capability.)
To use S-URL using a Community and allow Public Share links that users can use to open, download, upload or delete files or edit file metadata, see S-URL Setup (S-Drive 2.7.13 and later).
Note: If you have old public share links and decide to upgrade to the newer S-URL using Communities, your links will continue to work.
Public Share & S-URL features can be used separately but they have the same configuration.
S-URL: File URLs generated by Amazon S3 services are too long. It causes problems in some mail programs such as MS Outlook, and it is not easy to share. In order to use a shortened URL, you can use S-URL feature of S-Drive.
Public Share: You can share your files & folders to public users. You can set password, IP Range, Expire dates and so on. This feature is available in Lightning only.
Public Share & S-URL uses force.com Sites to create short URL with your brand name. You may need to buy force.com Sites license to use this feature. (To get more information please visit https://developer.salesforce.com/page/Sites)
1. Create A Force.com Site
In order to create a Force.com site, you need to navigate to Setup > User Interface > Sites and Domains > Sites. In this page, you can create a new site using the New button.
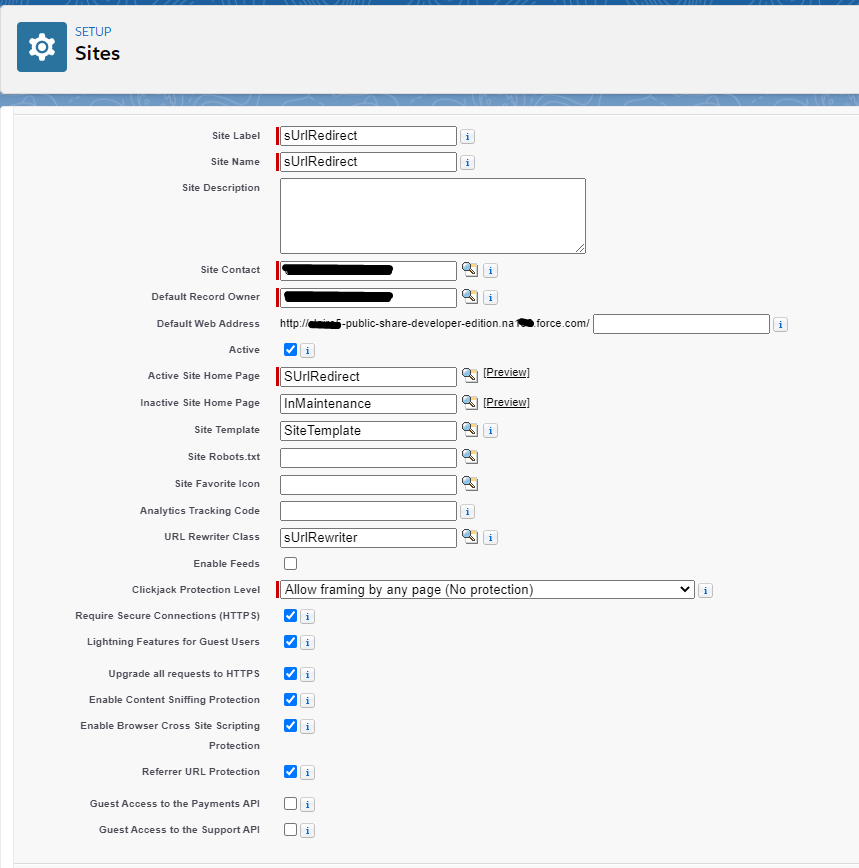
Site Label: Choose a label for your site.
Site Name: Choose a name for your site.
Site Contact: This is the name of the site contact.
Default Record Owner: User who will own the records created by Site Guest Users.
Default Web Address: This is the default web address that you will be using for your S-URLs. You can fill in the input box the way you want or you may leave it blank.
Active Site Home Page: Click on lookup and search for SUrlRedirect. Click on SUrlRedirect to choose and close the lookup page.
URL Rewrite Class: Click on lookup and search for SURLRewriter (Figure 9 1-6). Click on SURLRewriter to choose and close the lookup page.
Clickjack Protection Level: You can choose any protection level from this option.
Require Secure Connections (HTTPS): this box must be checked.
Lightning Features for Guest Users: this box must be checked.
Upgrade all requests to HTTPS: this box must be checked.
Once you configure these fields, click on "Save" button at the bottom of the page.
2. Configure the Public Access Settings of your Site Guest User Profile
Once you create your site you must configure permissions for your Site Guest User.
From Setup go to the Sites section again and find your site. Click on the site name to open the site detail page. Click on Public Access Settings in this page.
There are 3 important sections in the Public Access Settings Page.

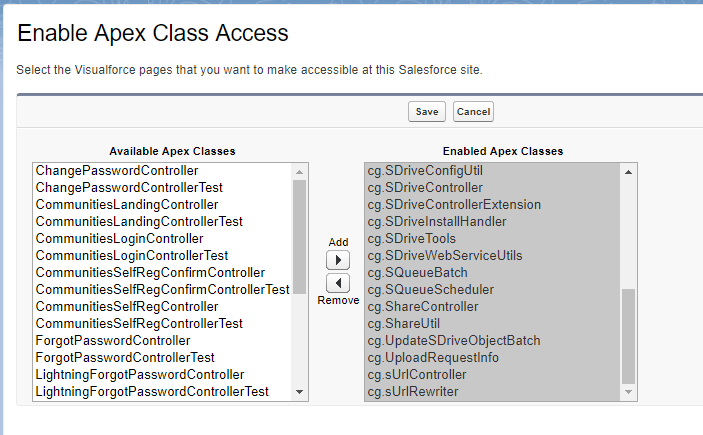
Enabled Apex Class Access: Click on Edit button when you navigate to this section by scrolling down. A new page will be opened. In this page choose all classes with prefix "cg" and add them to Enabled Apex Classes. Once enabled, Click Save.
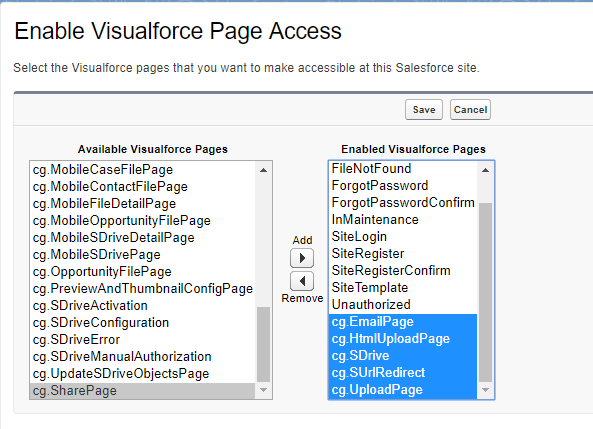
Enabled Visualforce Page Access: Click on Edit button when you navigate to this section by scrolling down. A new page will be opened. In this page choose cg.EmailPage, cg.HtmlUploadPage, cg.SDrive, cg.SUrlRedirect, cg.UploadPage visualforce pages and add it to the Enabled Visualforce Pages list.
Once you add the Visualforce page to the enabled list, click Save button.
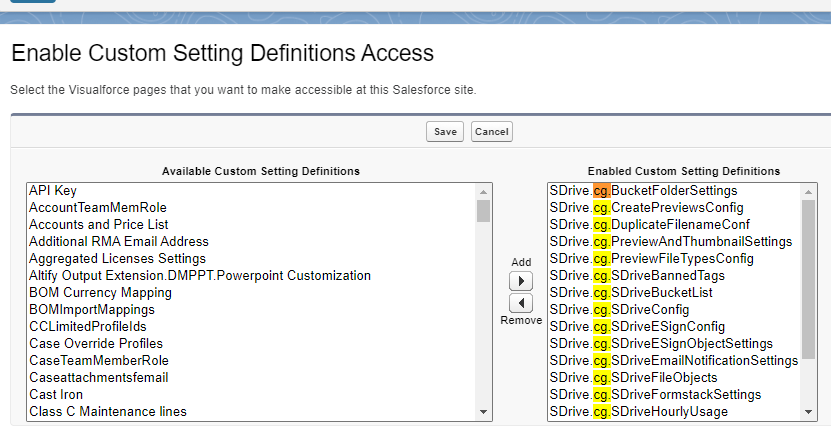
Enabled Custom Settings Definitions Click on Edit button when you navigate to this section by scrolling down. A new page will be opened. In this page choose all classes with prefix "cg" and add them to Enabled Custom Setting Definisions. Once enabled, Click Save.
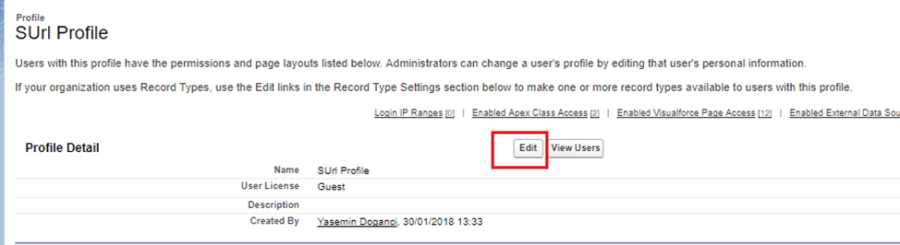
Object Permissions: For editing the Custom Object Permissions, click on the "Edit" button at the top of the page.
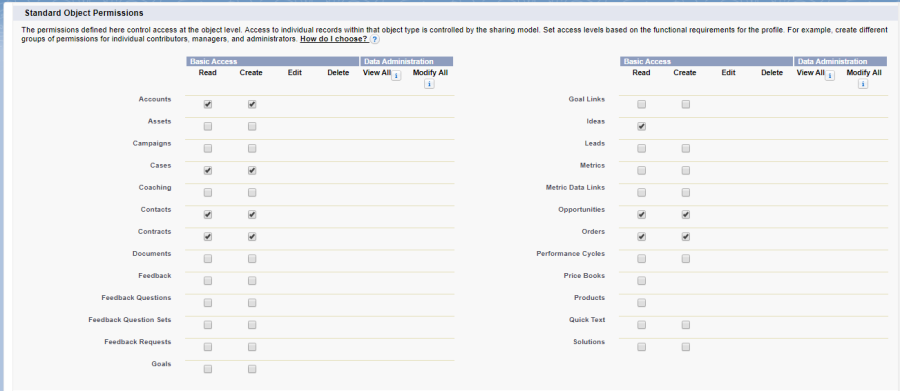
Scroll down to the Standard Object Permissions section.
If you want to share an object's files, give permission for its parent object. For example, if you want to share Account Files, you must also give READ permission to Account object.
For added security, disallow access to all possible fields on the parent object (some have access by default)
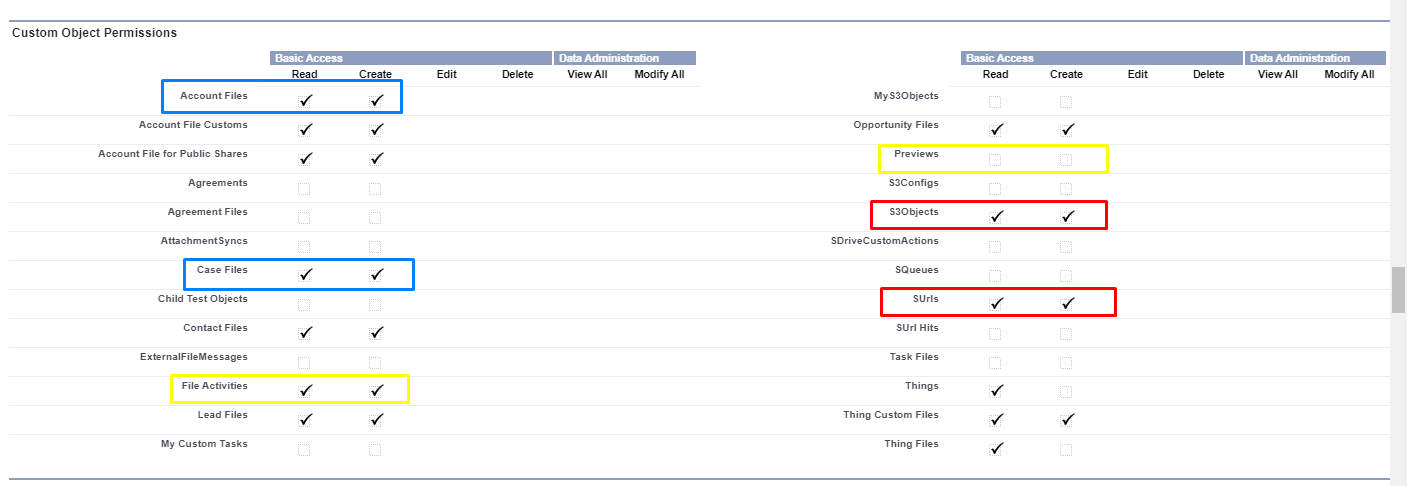
Scroll down to the Custom Object Permissions section and enable Basic Access for SUrls and Surl Hits objects.
Objects outlined in RED must be selected.
Objects outlined in BLUE are examples of file objects you might want to use for Public Share. Choose all the objects that you plan to share publicly.
Objects outlined in YELLOW are needed if you are using File Activities and/or Previews & Thumbnails.
Once you give the access, click on "Save" button at the top of the page.
3. Create Sharing Rules to allow your Guest User to access the files shared with Public Share Links
In Setup->Sharing Settings, go to the sharing rules section.
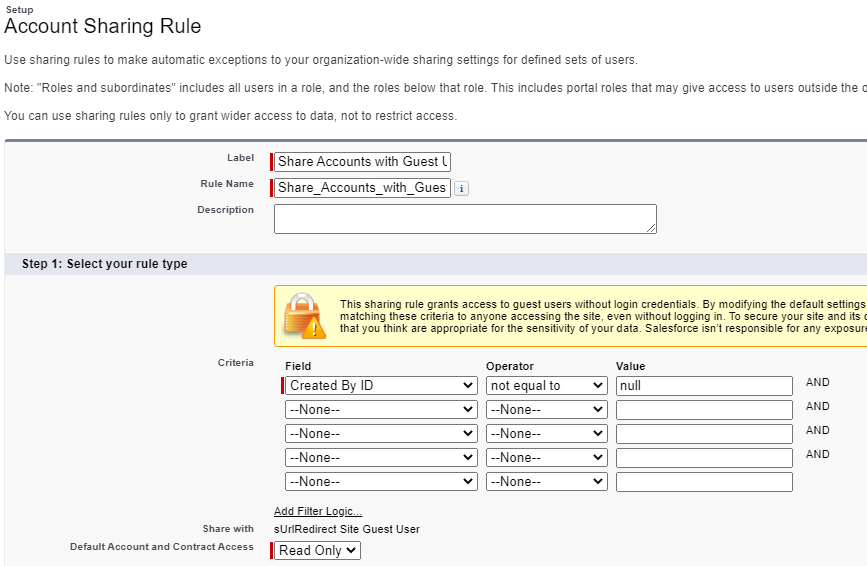
For the parent object (ex: Account), create a sharing rule to share all Accounts (in this example) with Guest User (only Read access is allowed.) Use criteria that is always true, such as CreatedById is not equal to null.
For the surl object, create a sharing rule to share all sUrls with Guest User. Use criteria that is always true, such as CreatedById is not equal to null.
If the file object has a lookup relationship to the parent, then on the file object itself, create a sharing rule to share all with the Guest User. Use criteria that is always true, such as CreatedById is not equal to null.
4. Configure S-URL in S-Drive Configuration
Go to the S-Drive Configuration page from App Launcher or from the S-Drive App.
Go to the Micro Services tab and scroll down to the S-URL section
Check the Enable S-URL box. Copy the URL from your force.com Site page into the S-URL Base URL box. (To find the site URL, go to Setup-->Sites. Click on your site and copy the URL. Be sure to put https:// at the beginning of the URL.
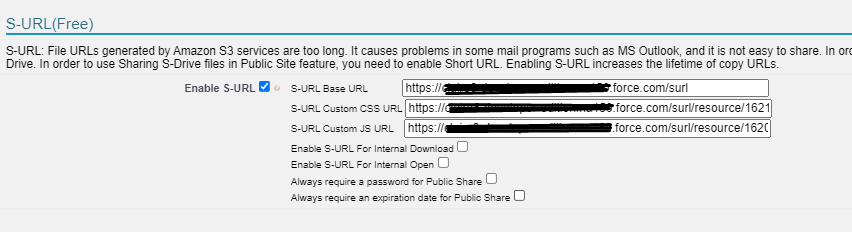
Choose whether to check “Enable S-URL for Internal Download” and “Enable S-URL for Internal Open.” These settings determine whether S-URL or Amazon AWS long URLs are used when a file is downloaded or opened by an internal user. If unchecked, S-URL will only be used for Public Share and Copy URL functionality.
Choose whether to require a password and/or expiration date on Public share links.
5. Check that Legacy S-URL is enabled
Go to Setup-->Custom Settings
Find SDriveConfig and click Manage
Find EnableLegacySurl and click on it. Make sure it is set to true. If not, edit it and set it to true.