DocuFetch User Guide
DocuFetch provides document collection by providing a way to:
Create a request asking for particular documents to be uploaded
Send the request link to a user outside of Salesforce, which will provide an upload button for each requested document
Allow the user to upload one or more documents, including documents that are pre-filled in via merge fields and documents that have been signed via e-signature by the user
Approve or reject the received documents, and request another document if one is rejected
Store the user-uploaded documents in S-Drive
Create document request templates to be used over and over again
Detail on each of these is provided below.
Document Collection Steps
1. Create a Request
On the Request component, click the + icon and “Create New Request”

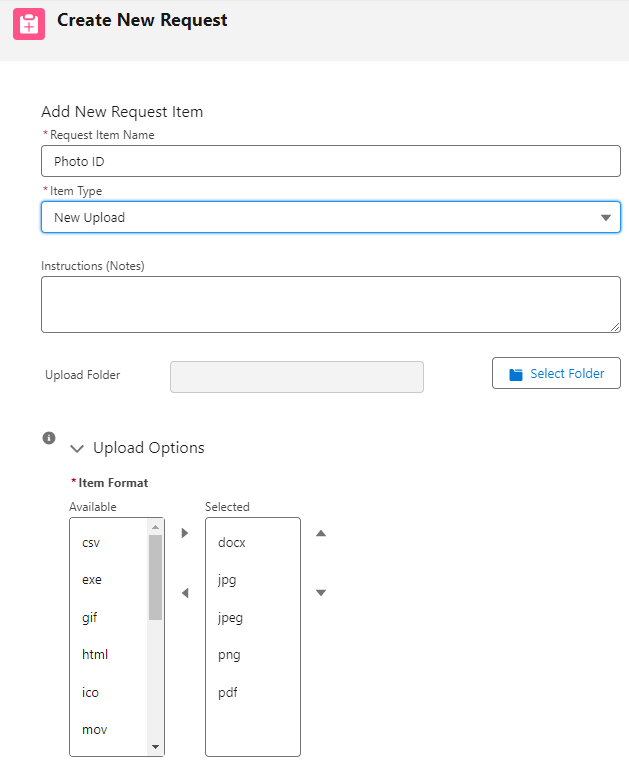
This will open a page where you will create Request Items to add to the Request. For example, one Request might have 3 Request Items.
Fill in the fields to create a Request Item and add it to the Request.

You can select a folder for the file to be uploaded to.
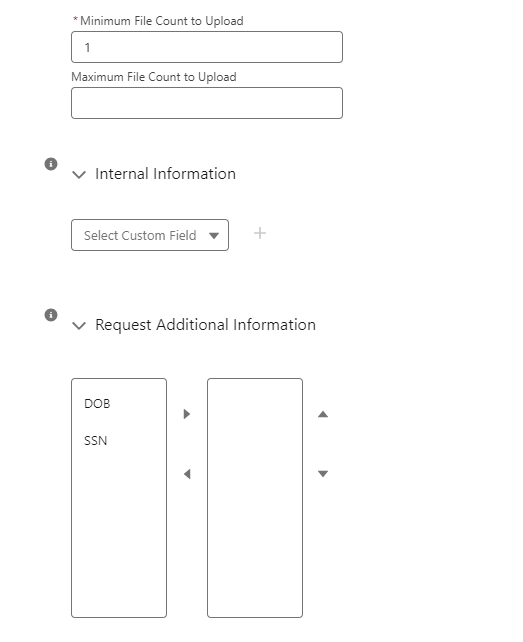
You can select a minimum and maximum number of documents to be uploaded for this request
Internal Information: if you have custom fields, you can fill these in and they will be saved with the file
Request Additional Information: if you have custom fields, you can have the requestee fill them in
When you’ve added all the Request Items, click Save New Request. Or you could also choose to save the Request as a Template and use it to create new Requests. When saving a template, there are 3 options:
Save for the current object only: All records for this object (in this example, all Accounts) will be able to access the template
Save template for all objects: All records on any object using DocuFetch can access the template
Choose objects to save template on: a popup will open that allows you to choose which objects you want this template to be accessible on.

You can save the request as a template and then still save it as a new request.
Once saved, you will see the Request on the Request component. You can copy the link and email it to the Requestee, edit the Request, or delete the request.

2. Send the Request to a Requestee
To send the request to someone, click the clipboard icon next the request to copy the link and send it out to the Requestee.
3. The Requestee View--uploading documents
When the Requestee clicks on the link, they will see a page with each request item.

The Requestee can click Upload and upload their documents.
As documents are uploaded, the Requestee will see progress

The Requestor in Salesforce will also see progress.

4. Approve/Reject Documents
Once files are uploaded, the Requestor in Salesforce can approve or reject the documents. This can be done even if not all the documents have been uploaded. The Requestor can click the Request as soon as there is progress, and will see each item listed. Items that have been submitted can be approved or rejected by clicking on the eye icon.
To see all items together, click on the eye icon on the top right.

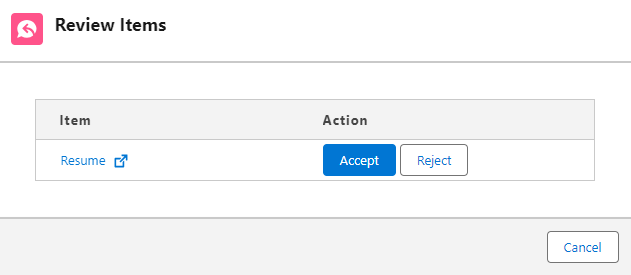
If a document is rejected, you have the Requestor has the option to delete the original file, keep it and allow the replacement to be a separate file, or keep it and have the replacement be a new version of the original file.
5. Files are stored in S-Drive
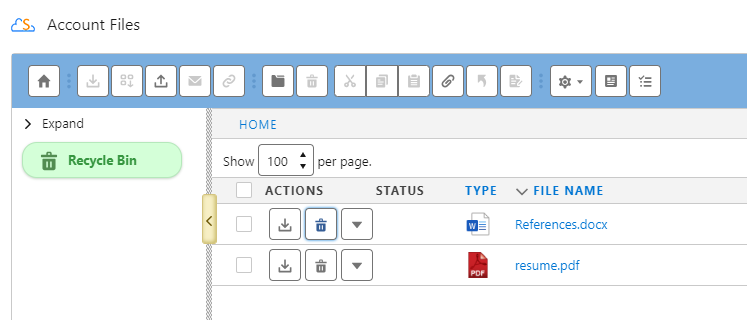
When the Requestee uploads a file, it goes into S-Drive and will show in S-Drive on the record the Request was sent from.
6. Create and use Request Templates
When you create a Request, you can choose to save it as a Template to use again later as described in Step 1.

You can create a new request from a Template
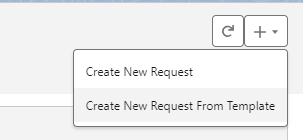
You’ll see your list of templates to choose from when you create a new request
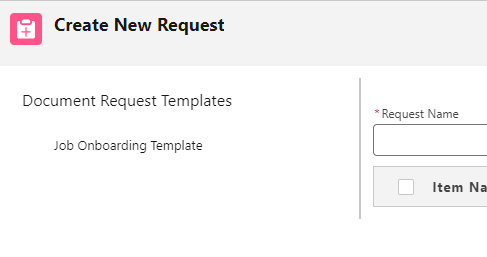
You can then choose which Items to include from the template and create your request

Request and Request Item additional details
Request Items
When you create a request, you create Request Items to Add to the Request.
Request Items have the following fields
Request Item Name: Name of this Item
Item Type:
New Upload - Requestee uploads a new file
Complete Form - Requestee verifies information and submits
Complete E-Signature -Requestee signs a form
Add Instructions: Requestee will see the notes or instructions you add
Upload Folder: Choose (or create) a folder for the file to be uploaded into. This will show in S-Drive. (Note: if the folder chosen has been deleted, which could happen if using a template, the file will be uploaded to the deleted folder if the folder is in the S-Drive Recycle Bin.)
Item Format: Select the type of files that are acceptable to upload. This option is only for Item Type of New Upload
Minimum File Count to Upload: Minimum number of files requested for this item
Maximum File Count to Upload: Maximum number of files they can upload
Internal Information: This allows you to store extra information from custom fields
Request Additional Information: You can create custom fields in SDrive Document Request Item and add those fields here for the Requestee to fill in. When they click to upload a file or verify a form, they will see the requested fields.
Editing a Request or Request Item
On the main page, click on the pencil icon next to a Request to edit it.
Then you edit the Request name, add items, or edit or delete existing items.

