
DocuFetch provides document collection by providing a way to:
-
Create a request asking for particular documents to be uploaded
-
Send the request link to a requestee--a user outside of Salesforce or a customer user--which will open a page to upload documents, sign a document or fill in a form.
-
Allow uploading one or more documents, including documents that are pre-filled in via merge fields and documents that have been signed via e-signature by the requestee
-
Allow the requester to approve or reject the received documents, and request another document if one is rejected
-
Store the requestee-uploaded documents in S-Drive
-
Create document request templates to be used over and over again
See DocuFetch Configuration for information about Configuring DocuFetch in S-Drive Configuration.
See the DocuFetch User Guide for information about using DocuFetch.
Overview
Use Case: Requesting Documents
Let’s say you run a company that provides temporary workers for other companies. You need applicants to submit several different documents to your program:
-
Application
-
Driver’s license or other ID
-
List of references
-
Resume
-
Sign a form with some information
With DocuFetch, you can create a Request template that has each of those items in it. You can then use the template to create a Request, and send the Request link to an applicant, asking them to upload the required documents and sign the document that needs a signature. When you receive the documents, you can take a look at them and either accept them or reject them. If rejected, you can send the request back to the applicant and ask them to try again.
When the documents are uploaded, they are stored in S-Drive for easy, organized access.
Providing Documents Requested
When the requestee receives a DocuFetch request link, they can click the link and see a page with each item that is requested. For each item they can click the corresponding button to complete the request--upload, fill in form, or e-sign.
They will see a progress bar for the request and a status for each item as they complete the request.
DocuFetch can be set up for users to open links either in a
For information on how to use DocuFetch after it is configured, see DocuFetch User Guide
Requirements
For basic document requests
-
S-Drive 2.25 or later
-
S-Drive Public Share/surl feature
-
In Step 2 of “S-URL and Public Share Setup” from the link above, give the created user Create/Read/Edit/Delete access to the following objects as well.
-
SDriveDocumentIntakeRequest,
-
SDriveDocumentIntakeRequestItem,
-
SDriveIntakeRequestItem_Template
-
SDriveIntakeRequest_Template
-
-
For Form Completion and/or E-Signature
You will need additional product packages to use Form Completion or E-Signature.
-
For Generate Document and Complete Form features
-
Formstack - Native form builder & data collection for Salesforce (AppExchange)- use for building data collection forms including prefilling data on web forms (DocuFetch “Complete Form” feature)
-
Formstack Documents (formerly WebMerge) - Document Generation (AppExchange)- automatically generate documents from your Salesforce data (DocuFetch “Review Document” and “E-Signature” features)
-
S-Drive DocuFetch add on packages for Formstack, Please open a support ticket with us to request these packages.
-
-
For Complete E-Signature, you’ll need either
-
Formstack Sign (Included in Formstack Documents)
-
AdobeSign (Adobe Acrobat Sign eSignatures for Salesforce)
-
DocuSign (DocuSign E-Signature for Salesforce - AppExchange)
-
AirSlate (Airslate.com)
Plus an addition package that we provide: -
S-Drive DocuFetch add on package for Formstack, AdobeSign, DocuSign or AirSlate. Please open a support ticket with us to request these packages.
-
DocuFetch Setup in Salesforce
Docufetch Path progress bar
Docufetch uses the Salesforce Path feature to show progress as the request is fulfilled. To implement Path, go to Setup → User Interface → Path Settings and click Enable.
DocuFetch can be used out-of-the-box on Accounts, Cases, Opportunities, Contacts, and Leads. If you are creating document requests from any of those objects, skip to Step 2.
Step 1 (custom objects only): Add a lookup field if using a custom object
Skip this step if you are using DocuFetch on Accounts, Cases, Contacts, or Opportunities.
You must define a relationship between your object and DocuFetch with a lookup field on SDrive Document Intake Request:
-
Go to Setup
-
In Object Manager, find SDrive Document Intake Request object
-
Go to Fields and Relationships and click New
-
Add a Lookup field to your custom object
Step 2: Add DocuFetch to your object Lightning page
Edit the Lightning Record Page of an object you want to use DocuFetch with. In the example, we’ll use Account.
Drag the SDrive DocuFetch component onto the Page.
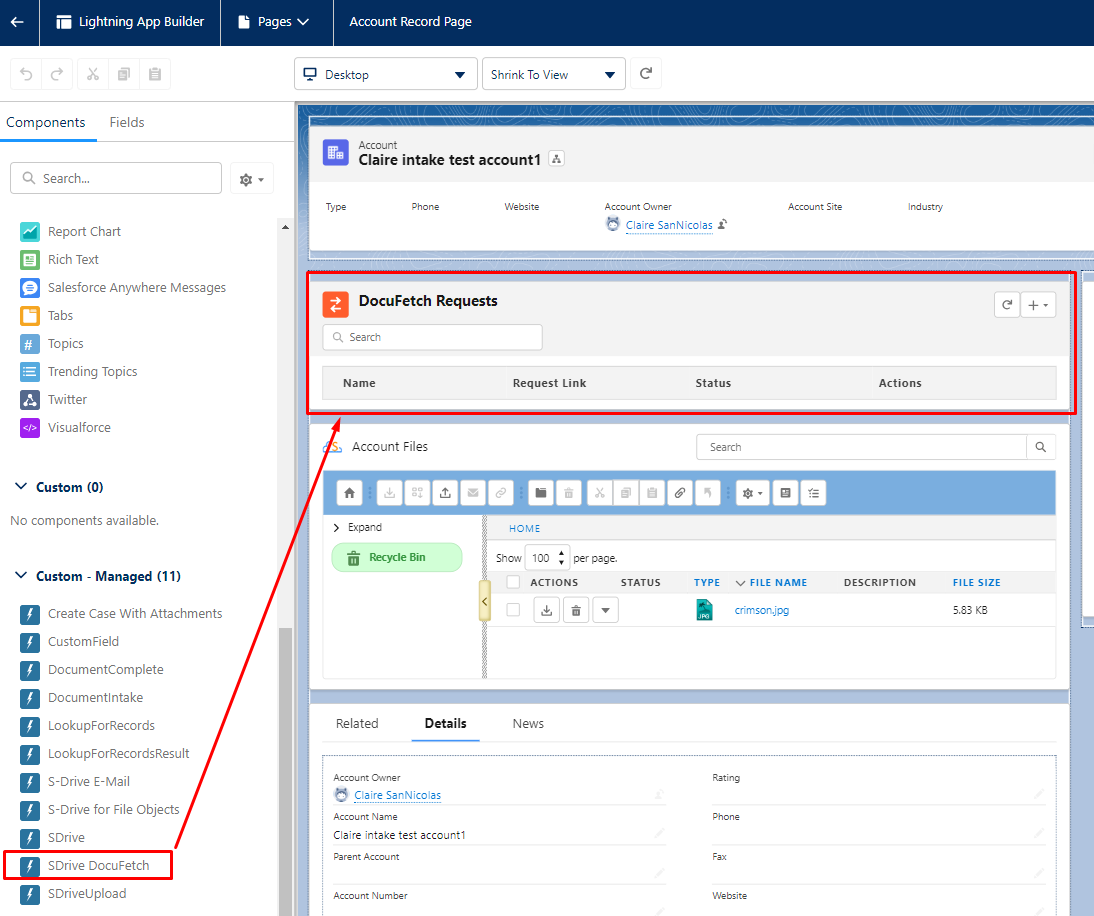
Click into the component and fill in the configuration as follows:
-
Title: The heading that will show on the component. If blank, the heading will be DocuFetch Requests
-
File Object Prefix: For S-Drive out-of-the-box objects (Account File, Case File, Contact File, Lead File, Opportunity File) this will be cg__. For Custom object files, it will be blank unless the object is part of another managed package.
-
File Object Name: the S-Drive File object where DocuFetch files will be stored, such as AccountFile__c.
-
Parent Object Relationship Name: The API name of the lookup field from Document Request object to the object you’re relating it to. In this example, we’re using DocuFetch on Account, so the lookup field is cg__Account__r. For a custom object, it’s the name of the field you set up in Step 1.
Save the settings and Go Back to the Account Page. Now you’re ready to create a Request Item.
Customization
DocuFetch has a completion page on the requestee side that can be customized. The default page has a Congratulations heading and a message that says “You have completed all requested items”
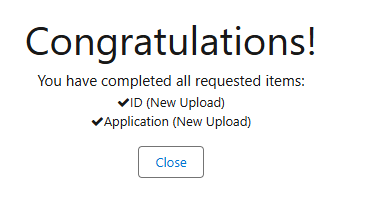
These two messages can be configured via Translation Workbench. The custom labels are
-
Setup > Custom Labels > Congratulations
-
Setup > Custom Labels > Request_Completed_Header
Permissions
There are four DocuFetch objects that users may need permissions for depending on what they need to do.
-
SDrive Document Intake Request - requests
-
SDrive Document Intake Request Item - items listed on a request
-
SDrive Intake Request Template - templates that can be used again and again to create requests
-
SDrive Intake Request Item Template - items listed on a template
We have provided 3 permission sets:
-
SDrive DocuFetch User - permissions needed to create DocuFetch Requests and read (use) DocuFetch Templates
-
SDrive DocuFetch Template Creator - permissions needed to create, edit, and delete DocuFetch templates. There are no permissions for creating requests. This permission set can be combined with SDrive DocuFetch User to give users the ability to create their own templates as well as using DocuFetch to create requests.
-
SDrive DocuFetch Admin - permission to everything in DocuFetch including View All and Modify All permissions on all DocuFetch objects.
DocuFetch request links are accessed via S-Drive Public Share. Therefore the Public Share user needs profile permission on all the above objects also. See S-URL and Public Share Setup for how to set up Public Share.
Formstack Configuration for DocuFetch
Some features of DocuFetch require Formstack integration.
For Generate Document, Complete Form, and Complete E-Signature features*
-
Formstack - Native form builder & data collection for Salesforce (AppExchange)- use for building data collection forms including prefilling data on web forms
-
Formstack Documents (formerly WebMerge) - Document Generation (AppExchange)- automatically generate documents from your Salesforce data
-
Formstack Sign (Included in Formstack Documents) - routing documents for Signature
Formstack Installation:
Formstack - Native form builder & data collection for Salesforce can be installed directly from AppExchange. It is only needed if you want to generate pre-filled forms.
Formstack Documents (formerly WebMerge) - Document Generation + Formstack Sign can also be installed directly from AppExchange. It is needed to generate forms with merge fields and send requests for e-signature.
Read more about Formstack integration with Salesforce.
Documents + Sign:
-
Once installed, you will get invited to your Formstack.com account where the Documents & Sign products are housed
-
Then follow these instructions for setting up Formstack Documents which include using the Formstack Documents API key to setup in the Salesforce org
-
Set up your Formstack Sign delivery to deliver a document for digital signature and save that document back to Salesforce. Note that a Formstack Sign is tied to a specific email address, so that when licensing Formstack Sign for this use case you’d typically do so with a single Formstack Sign account.
airSlate Configuration in S-Drive
You will need:
-
an airSlate Account
-
S-Drive 2GP (2nd generation package) for airSlate
Note: There is no extra AppExchange package from airSlate that needs to be installed in Salesforce
Once the above is set up
-
Go to S-Drive Configuration->Micro Services and click on
Configureunder Docufetch Configuration -
Select airSlate for Review Document
-
Click the Configure button
-
Follow the instructions on the next page as described here:
-
Step 1: Click on “Go To Auth Providers” and then click on the AirSlateSDriveAuthProvider and copy the Callback URL at the bottom of the page
-
Step 2: Go to the airSlate Dashboard and click Applications on the left. If there is no application for using airSlate with S-Drive, click Add App. Name your app anything you want. Click through the menus without changing anything until you’re done. Then click on the application and paste the Callback URL into the Application URL

-
Step 3: go back to the Auth Provider page where you copied the callback URL and click Edit. Copy the Client Id from the airSlate app into the Consumer Key box of the Auth Provider. Copy the Client Secret from the airSlate app into the Consumer Secret box of the Auth Provide. Click Save.
-
Step 4: Go to Setup->Named Credentials and click Edit on AirSlateSDriveNamedCredential and then save without changing anything.
-
Now you are ready to use airSlate in DocuFetch.
Formstack Document Intake Component Setup in Salesforce
-
Enable Formstack for file object that will use Document Intake
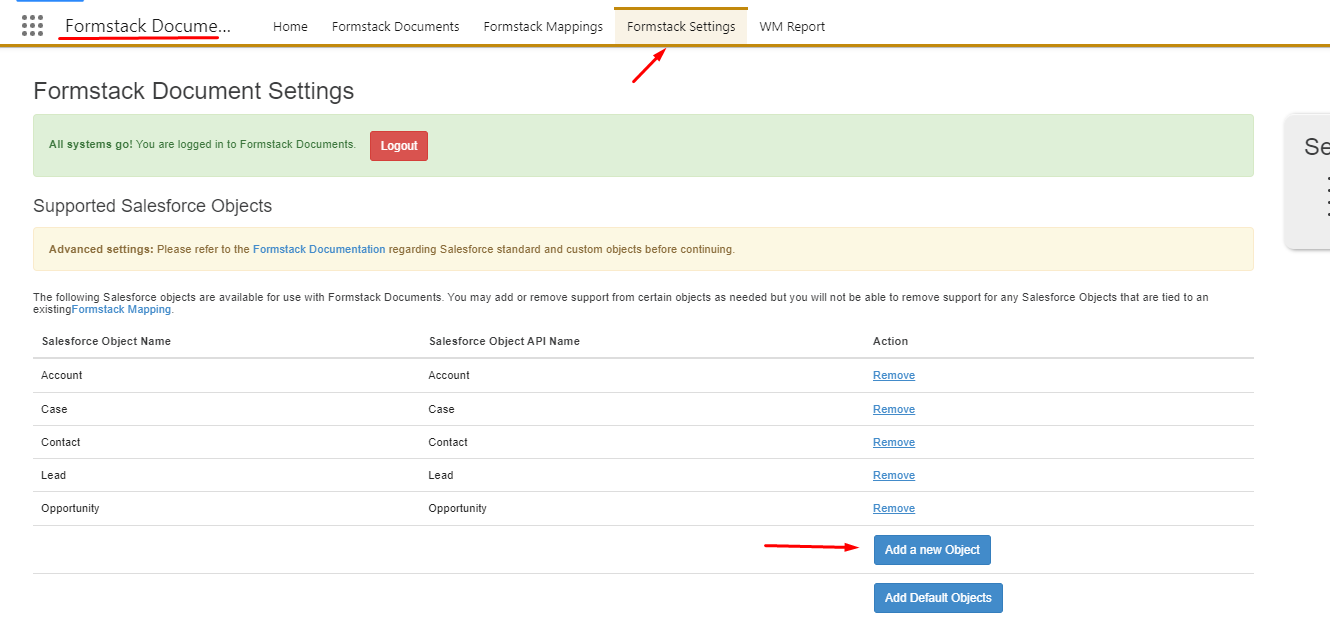
-
Use the same API credentials of Formstack account that you’ll use in the 2nd step of Formstack Setup.
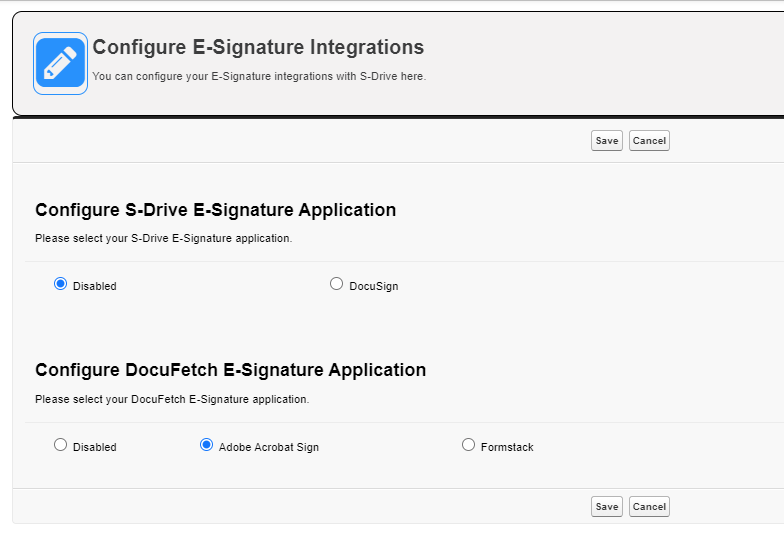
AdobeSign Setup in Salesforce
Package Installations and S-Drive Configurations
-
Install Adobe Acrobat Sign eSignatures for Salesforce from AppExchange
-
Install SDrive ASign Package (Contact Sales or Open a Support Ticket to get the package)
-
Setup Public Share (see next section)
-
Add Remote Site Settings and Trusted URL endpoints:
-
EAdobe Acrobat Sign for the E-Signature Service of DocuFetch. SDriveConfiguration → Micro Services → E-Signature Configuration.
Adobe Acrobat Sign Configuration
-
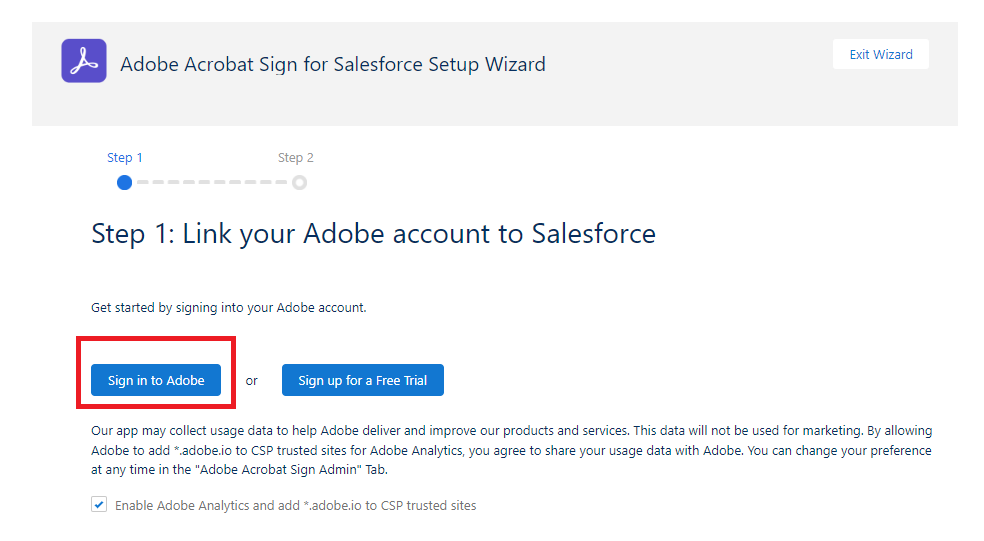
From the Salesforce App Launcher, go to the Adobe Acrobat Sign for Salesforce and click on the Adobe Acrobat Sign Admin tab to connect your Adobe account to Salesforce. Use
Sign in to Adobeto continue and make sure the checkboxEnable Adobe Analytics and add *.adobe.io to CSP trusted sitesis enabled.
-
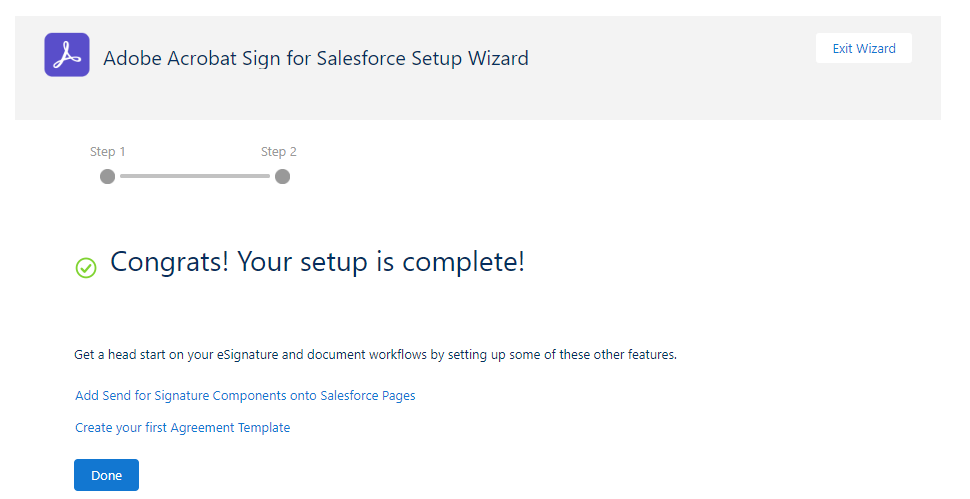
You’ll see the success page. Click Next.

-
The
Automatic Status Updatessetting has to be enabled so that agreements can be sent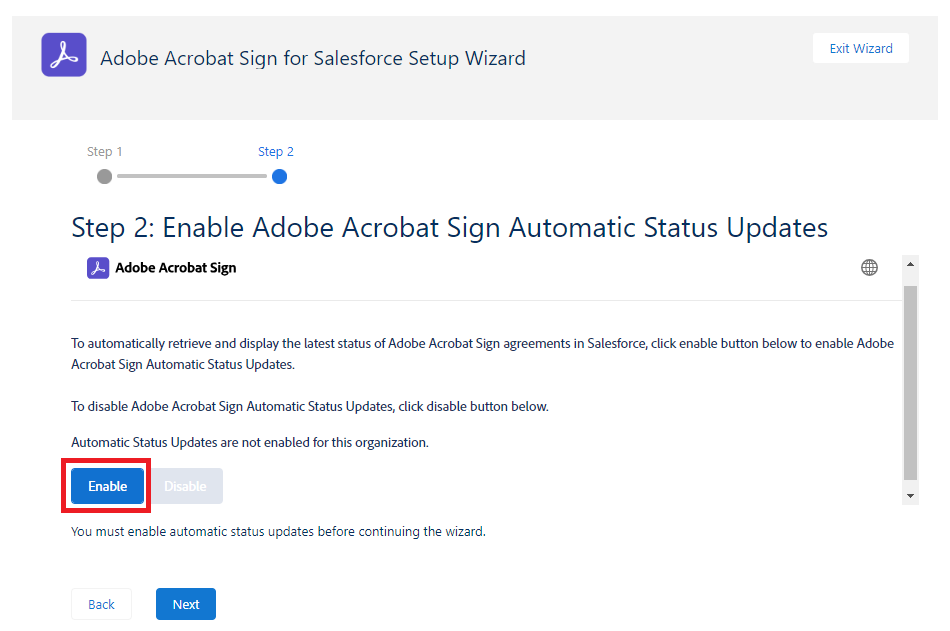
-
Return to the Adobe Acrobat Sign Admin tab. Click
Generate Sample Self Sign Agreement Templateto create a template. Use the Attachment tab to upload the document you want to send, and the Recipient tab to select who you want the agreement sent to. See https://helpx.adobe.com/sign/integrations/salesforce-self-sign.html#allow-sending-as-others for more details.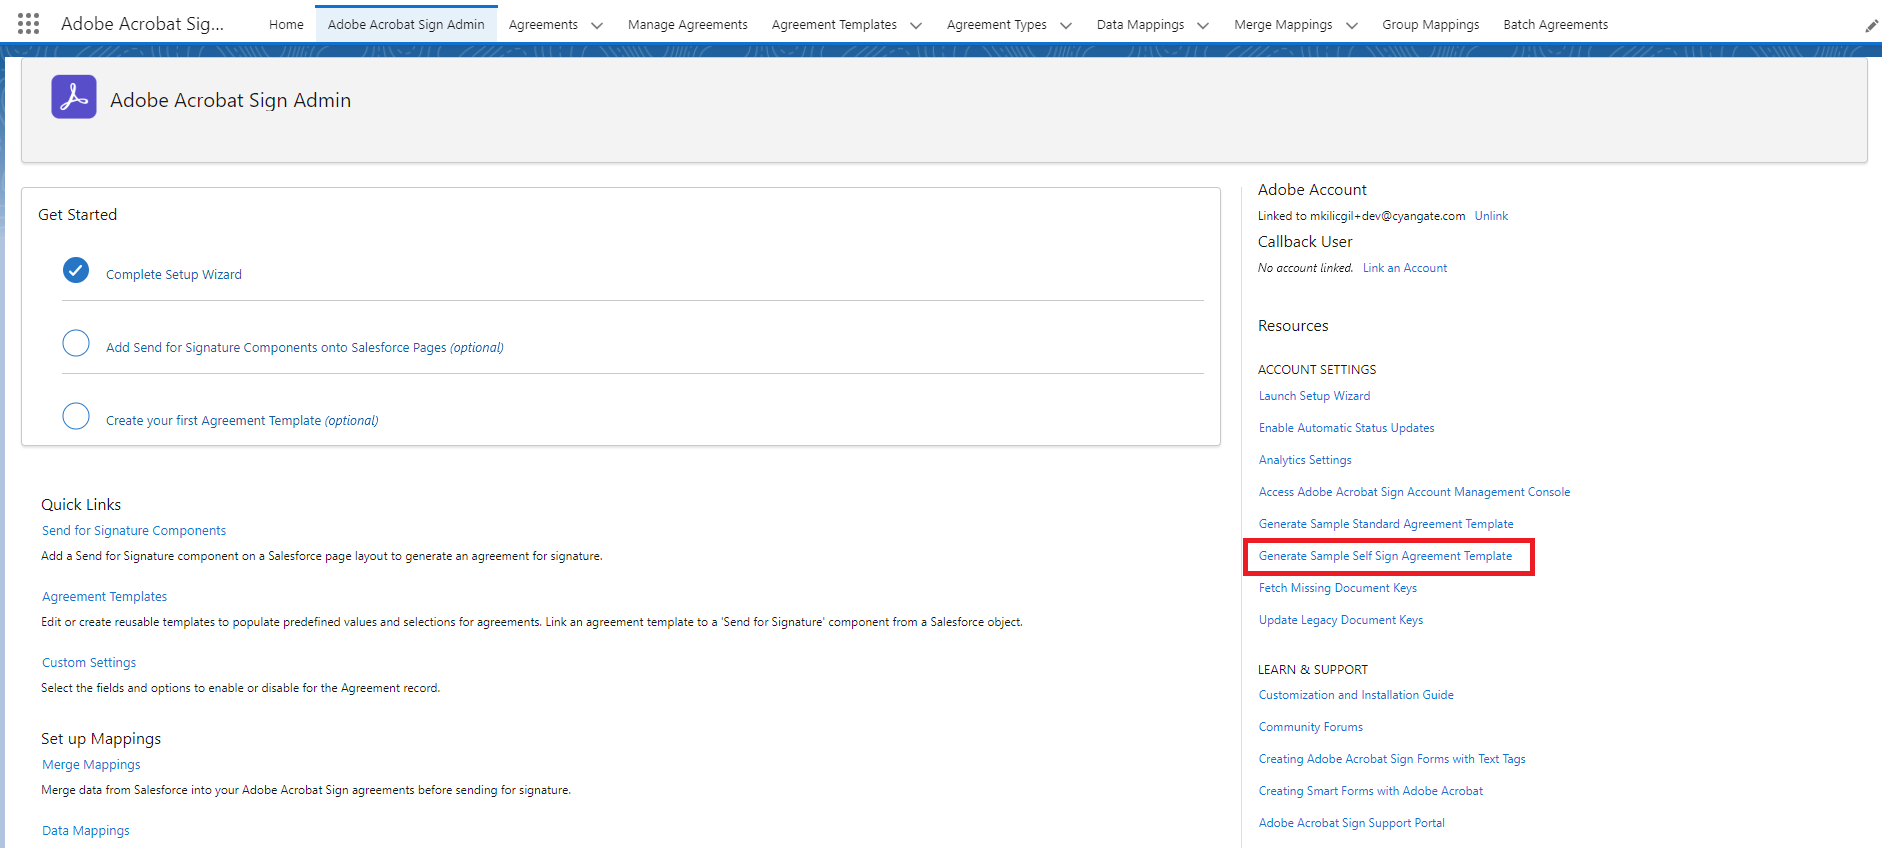
-
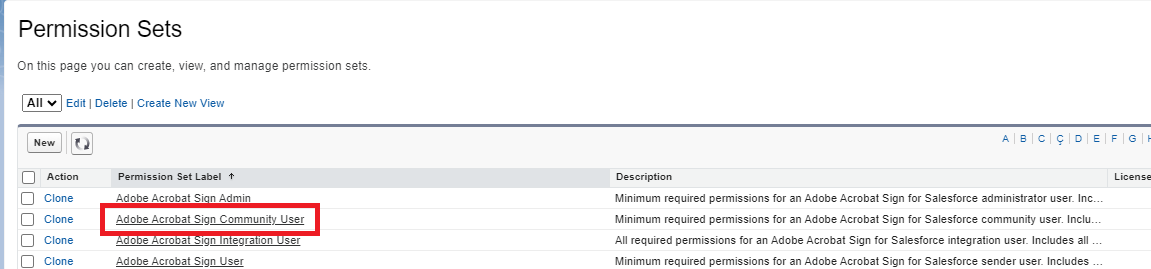
Assign permission sets for the community user. The Adobe Acrobat Sign Community User permission set should be the community user that you’ve created in the SURL setup.
-
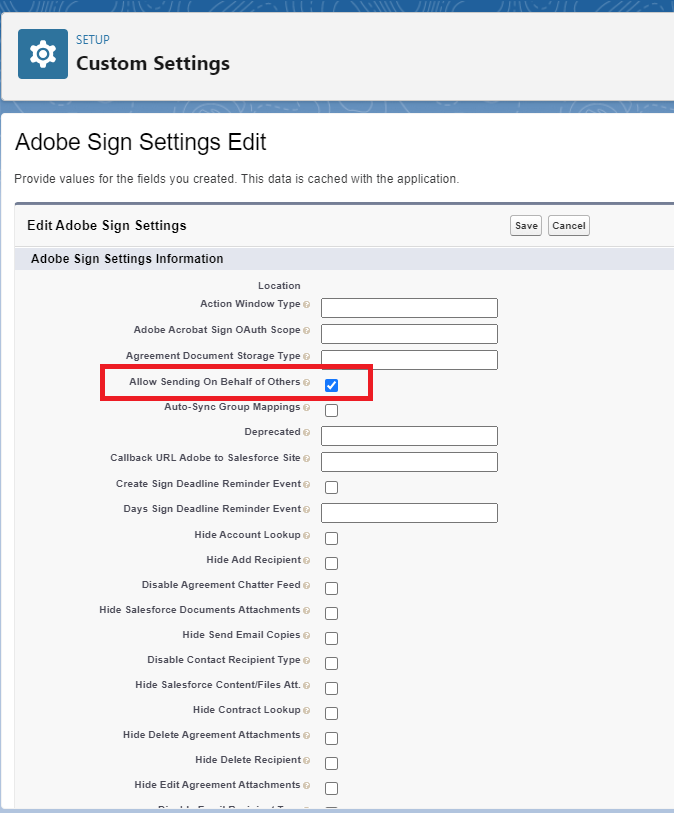
Enable Allow Sending on Behalf of Others custom setting.
-
Go to Setup-->Custom Settings
-
Find Adobe Sign Settings and click Manage next to it
-
Click New
-
Check the box next to Allow Sending On Behalf of Others
-
-
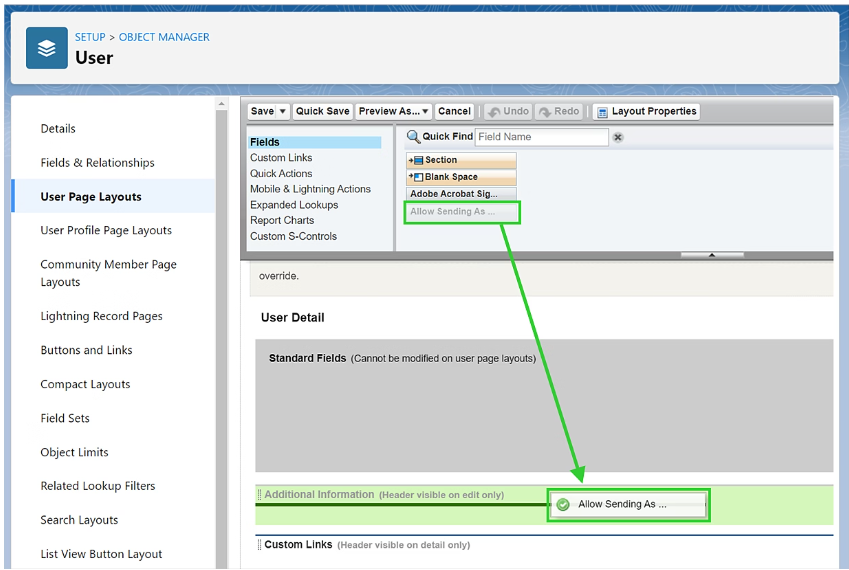
Enable “Allow Sending on Behalf of” for the admin (who has the Adobe Acrobat Sign license). Before enabling it, you’ll need to configure the page layout of the User. Go to User from the Object Manager, and select User Page Layouts.
-
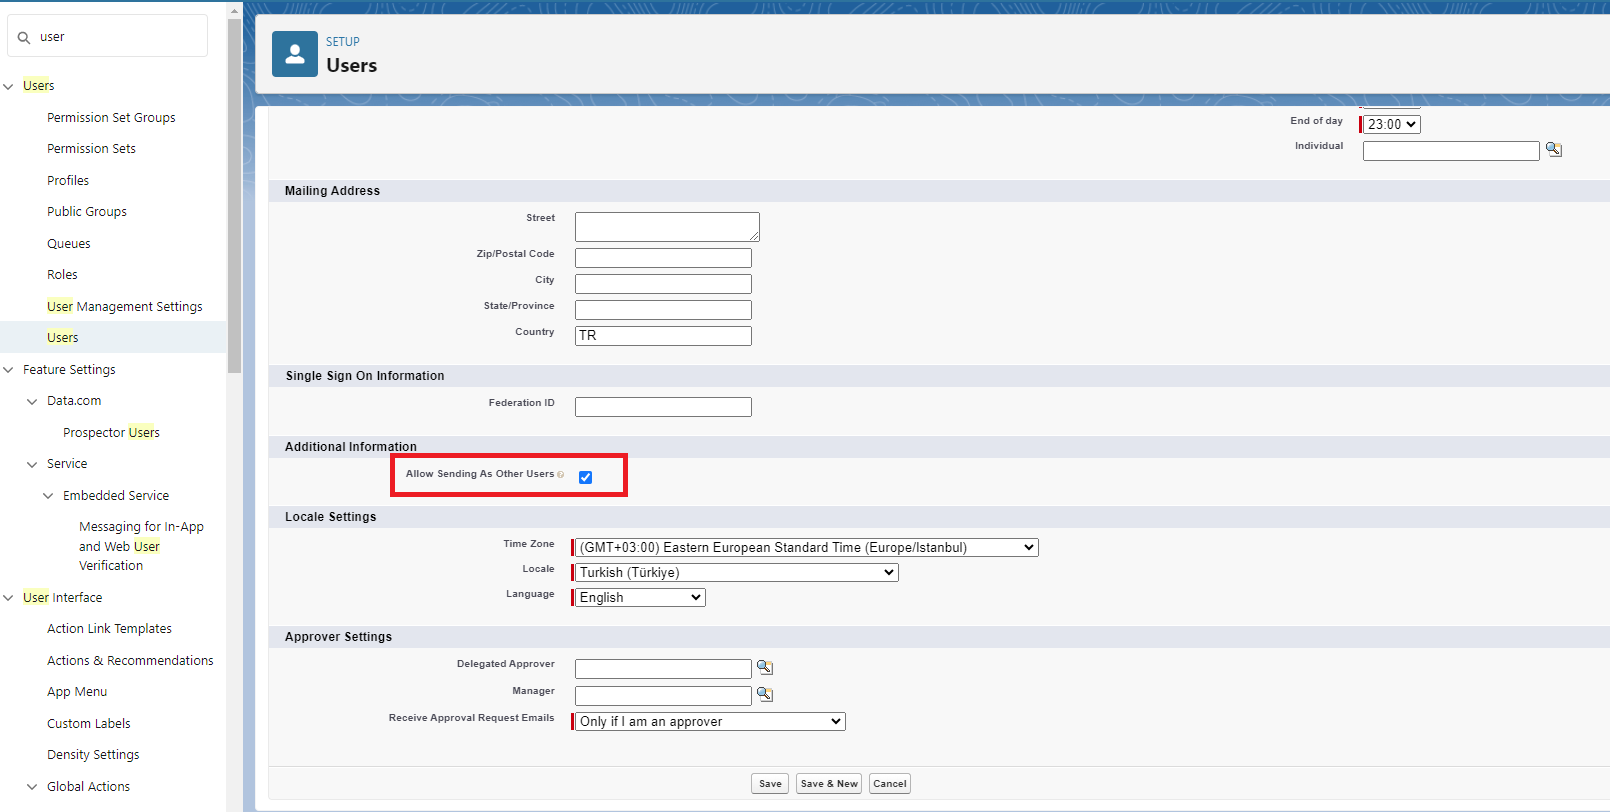
Go to the Admin user and edit it. Below enable Allow Sending As Other Users
-
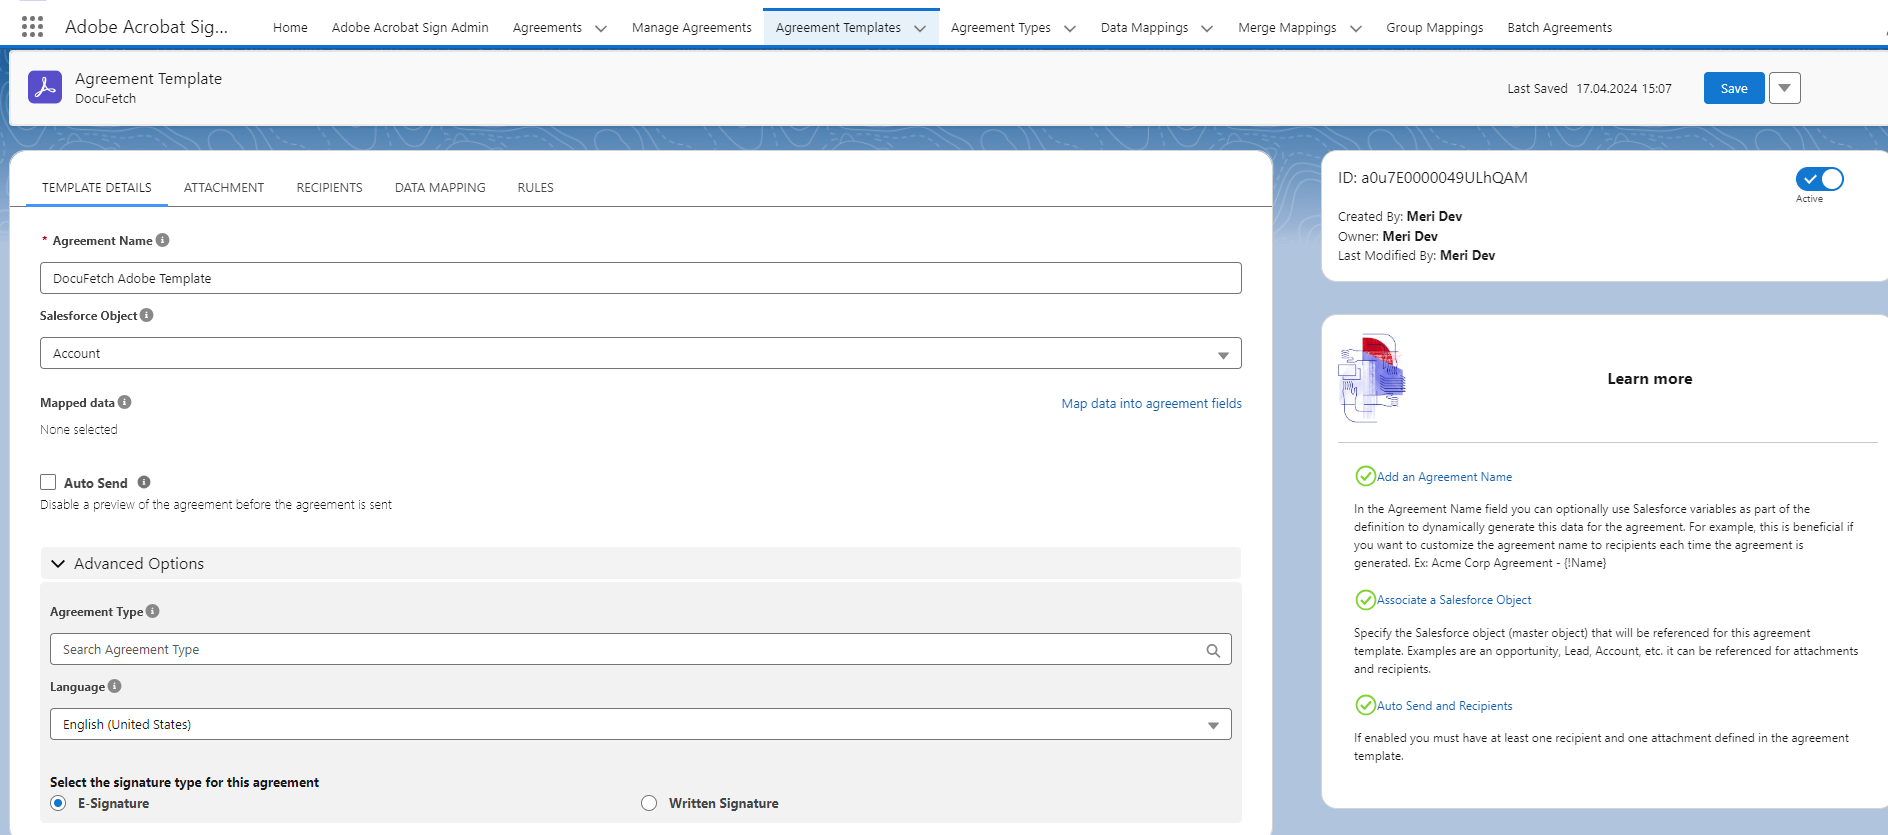
Create a new Agreement Template You can configure object, attachment, and recipient fields as you wish. In the recipients tab, set the admin user id to Send on behalf of. This configuration is for sending agreements using the admin user’s license, otherwise license error is given.

-
Grant access to the SURL community profile for Adobe Acrobat Sign objects and fields. Make OWD public read/write for Agreement Object. CRUD and FLS permissions should be set for the following objects:
-
Agreement Template (echosign_dev1__Agreement_Template__c)
-
Agreements (echosign_dev1__SIGN_Agreement__c)
-
Merge Mapping (echosign_dev1__SIGN_Merge_Mapping__c)
-
Data Mapping (echosign_dev1__SIGN_Data_Mapping__c)
-
-
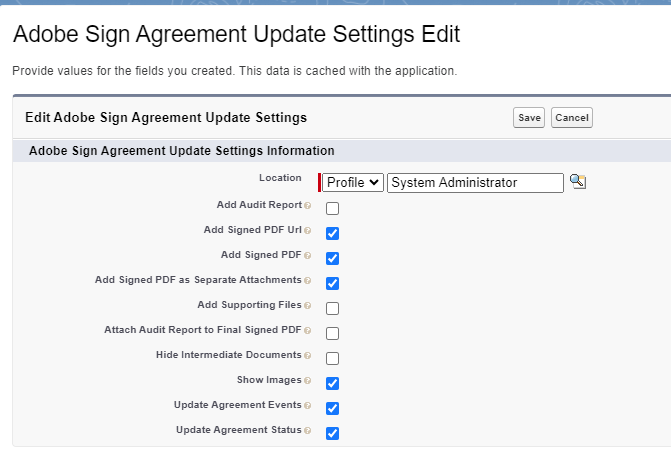
Enable Add Signed PDF as Separate Attachments to save signed PDFs as salesforce files. Custom settings → Adobe Sign Agreement Update Setting → New
-
Because the community user sends agreements for signature using the admin user’s Adobe license, the community user should access the admin profile.
-
Open Dev Console
-
Query the Adobe Admin User with this query:
SELECT Id, Username, Email, UserPreferencesShowEmailToExternalUsers FROM UserWHERE Id = '005xxxxxxxxxxxx'where the Id is the record id of the user -
Double click on the field UserPreferencesShowEmailToExternalUsers and check the box.
-
Click Save Rows
-