
When you are using S-URL, you have a Connected App that uses a Self-Signed Certificate. These certificates expire. This page tells you how to update your certificate.
For initial S-URL Setup, see S-URL and Public Share Setup
To update your certificate, you’ll need to do the following steps, which are detailed below.
Create a new self-signed certificate
-
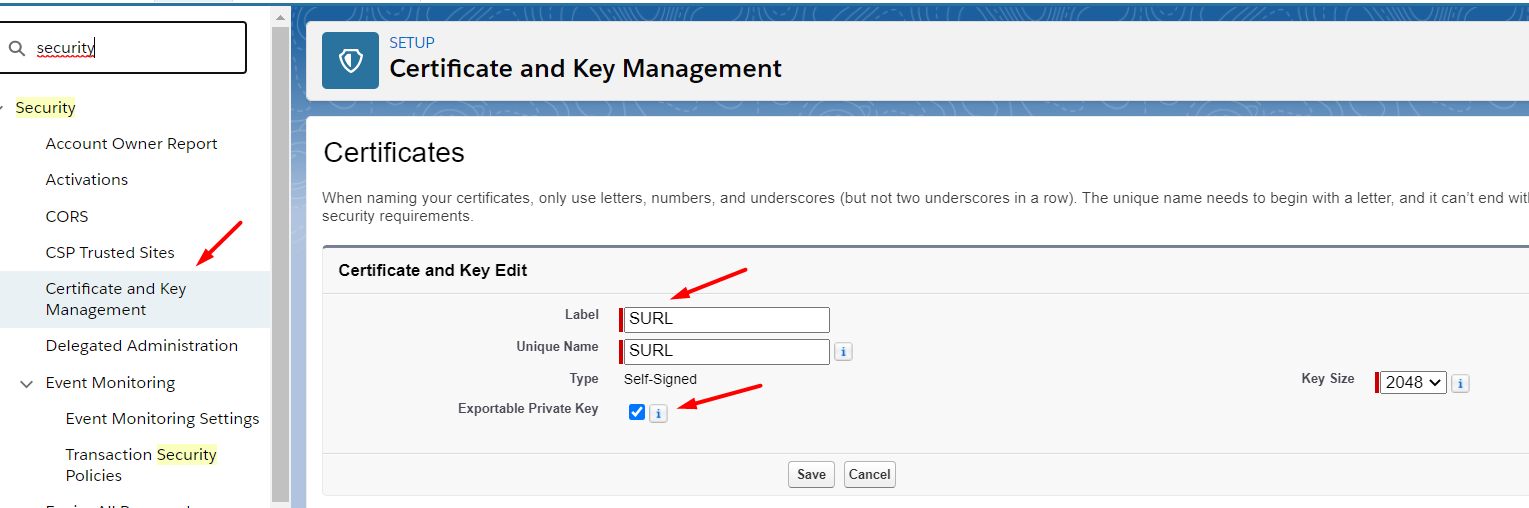
Go to Setup > Security > Certificate and Key Management.
-
Click on Create Self-Signed Certificate.
-
Give it a label and the unique name. If you delete the expired certificate first, you can use the same name you used before. Otherwise give it a new name.
-
Make sure the Exportable Private Key is checked.
-
Click Save.
-
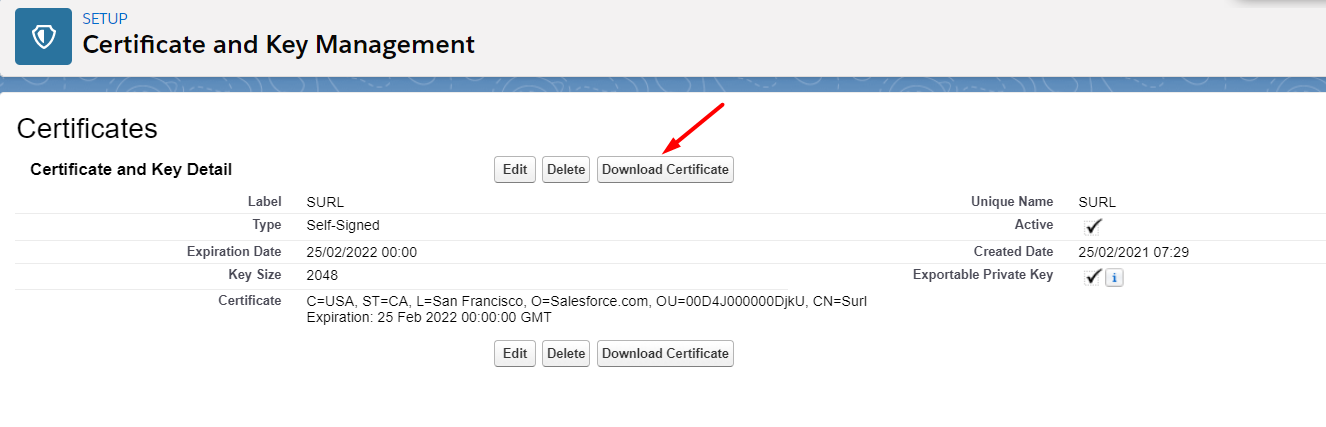
Click on the certificate you just created.
-
Click Download Certificate
Update the Custom Setting with the certificate name if needed
If you gave your certificate a new name, you need to update the custom setting where it’s stored. If you deleted the old certificate and are using the same name, skip this step.
-
Go to Setup-->Custom Settings
-
Find SDriveConfig and click Manage next to it
-
Click Edit next to SUrl_Community_Certificate
-
Enter the new name of your certificate
Upload the new certificate to your Connected App
-
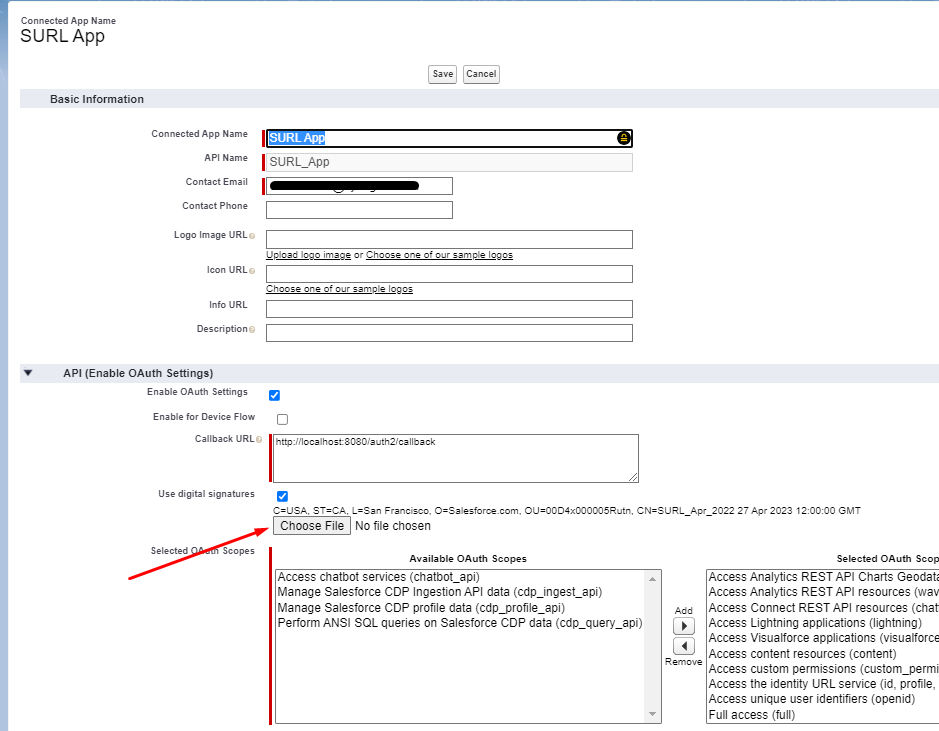
Go to Setup-->App Manager
-
Find your SURL connected app. It probably has SURL in the name and the App Type is Connected
-
Click the down arrow next to it and click Edit

-
Click Choose a File
-
Upload the certificate you downloaded in the first step
-
Click Save
-
You’ll get a message saying it can take up to 10 minutes. Click Continue
Your certificate is now updated.