
File/Attachment Sync copies files uploaded to Salesforce Files or Attachments into S-Drive automatically. You can also have the Salesforce copies deleted after syncing to save Salesforce storage.
When to use it
-
Users or integrations upload to Salesforce Files, and you want the files kept in S-Drive.
-
You want to save Salesforce file storage by moving files to S-Drive.
-
You want files attached to incoming emails or Chatter posts saved in S-Drive.
How it works
When a file or attachment is added to a record on an object you've set up for sync, it's added to a queue and copied to S-Drive on the same record, usually within seconds or a few minutes. It works in both Classic and Lightning.

-
Sync is one-way and only happens when a new file or attachment is added. Updating or deleting the Salesforce file doesn't change the S-Drive copy, and changes in S-Drive don't go back to Salesforce. After syncing, they're two separate files.
-
Files that were in Salesforce before sync was set up aren't synced automatically. You can sync them separately in the settings.
-
If Delete Files After Syncing is on, the Salesforce file is deleted after it's synced. See Delete Files After Syncing for exactly when a file is removed from Salesforce completely.
-
Files attached to incoming emails can be synced too, with rules to skip things like signature images.
File sync with Chatter
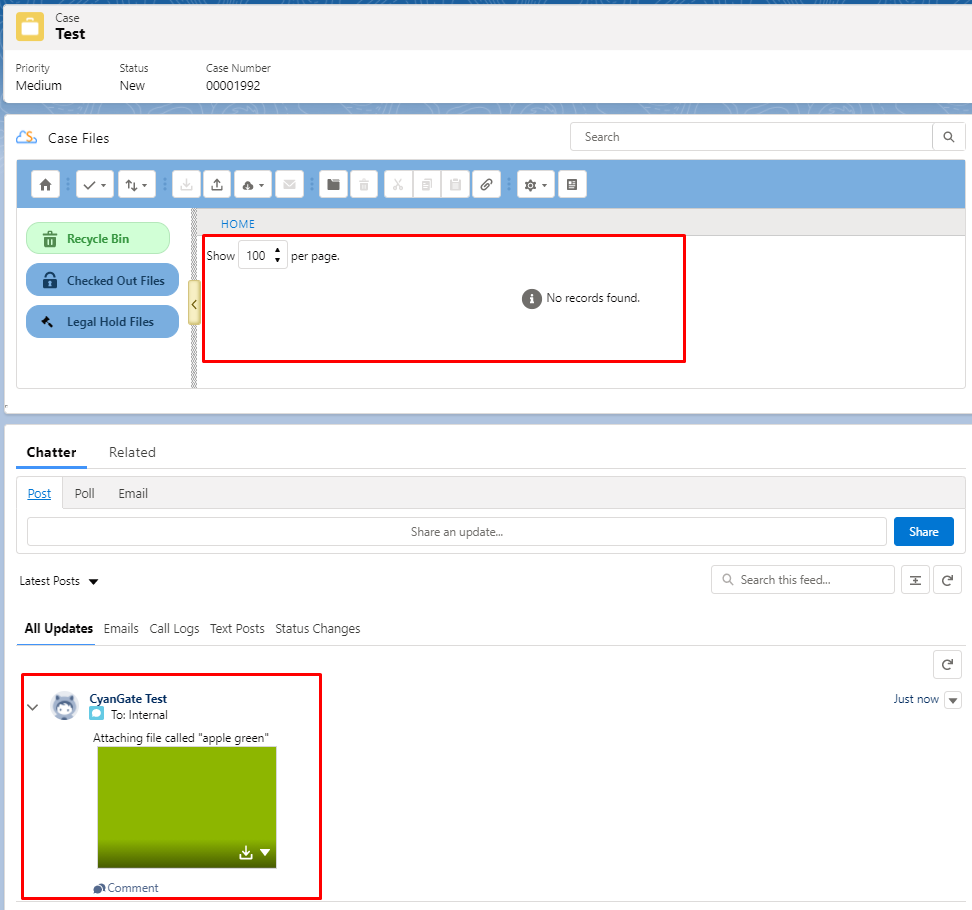
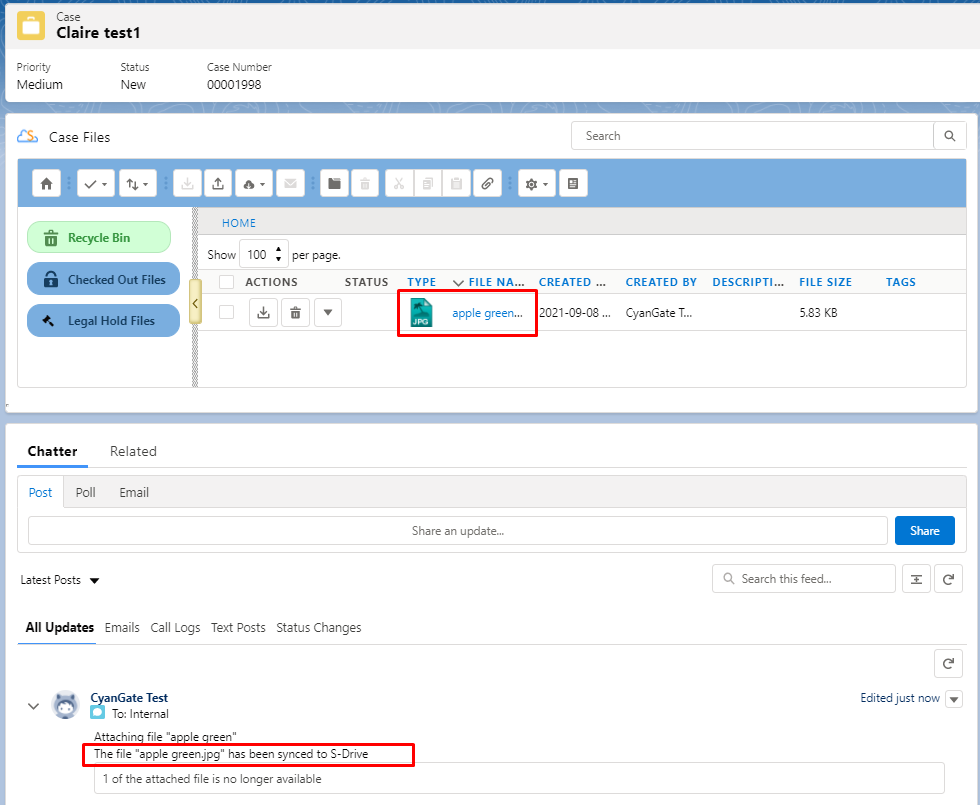
Files attached to Chatter posts are “Files” in Salesforce and are synced to S-Drive if file sync is configured. If Delete Files After Syncing is on, the file is deleted from the Chatter post. You can have a message added to the post saying that the file was synced to S-Drive.
In this “before” image, a file is attached to a Chatter post.
After refreshing the page, it is synced to S-Drive and a message appears in the Chatter post telling the user the file was synced.
Using File/Attachment Sync
Users don't need to do anything different. They upload files to Salesforce Files, Attachments, Chatter, or email as usual, and the files appear in S-Drive on the same record.
Set it up
Before you start
File Sync and Attachment Sync use a callout to sync the file or attachment to S-Drive, so the outbound message user and uploading users need the right permissions.
Outbound message user
Go to Setup->Outbound Messages (under Workflow Actions)
Only FileSync Callout and AttachmentSync apply to File/Attachment Sync, but it’s good to check the others as well. For each action below, click on the action and ensure the “user to send as” is an active user.
-
AttachmentSync
-
FileSync Callout
-
Preview Callout
-
FileSizeRequest Callout
-
SDriveJob Callout
Users who upload Salesforce Files
Users who upload files that will be synced must have:
-
Attachment Sync object permission (read/create/edit + field accessibility)
-
Create access to the file object they sync to (for example, Account File) and its fields
Setup checklist
-
Check the outbound message user and its permissions (see Before you start).
-
Give users who upload files the Attachment Sync object permission and Send Outbound Messages permission.
-
Choose the objects to sync, and whether to delete files after syncing, in Services › File/Attachment Sync.
-
Optional: to add a message to Chatter posts when their files are synced and deleted, give the S-Drive Portal User the Modify All Data permission and turn on the setting in General Settings.
-
Optional: sync files that were uploaded before you set up sync, in Configure File Sync of Pre-existing Files.
Limitations and notes
-
Sync is one-way, and only new files and attachments are synced automatically.
-
Don't delete failed or hung AttachmentSync records while Delete Files After Syncing is on, or you may lose files. See Sync Status.