
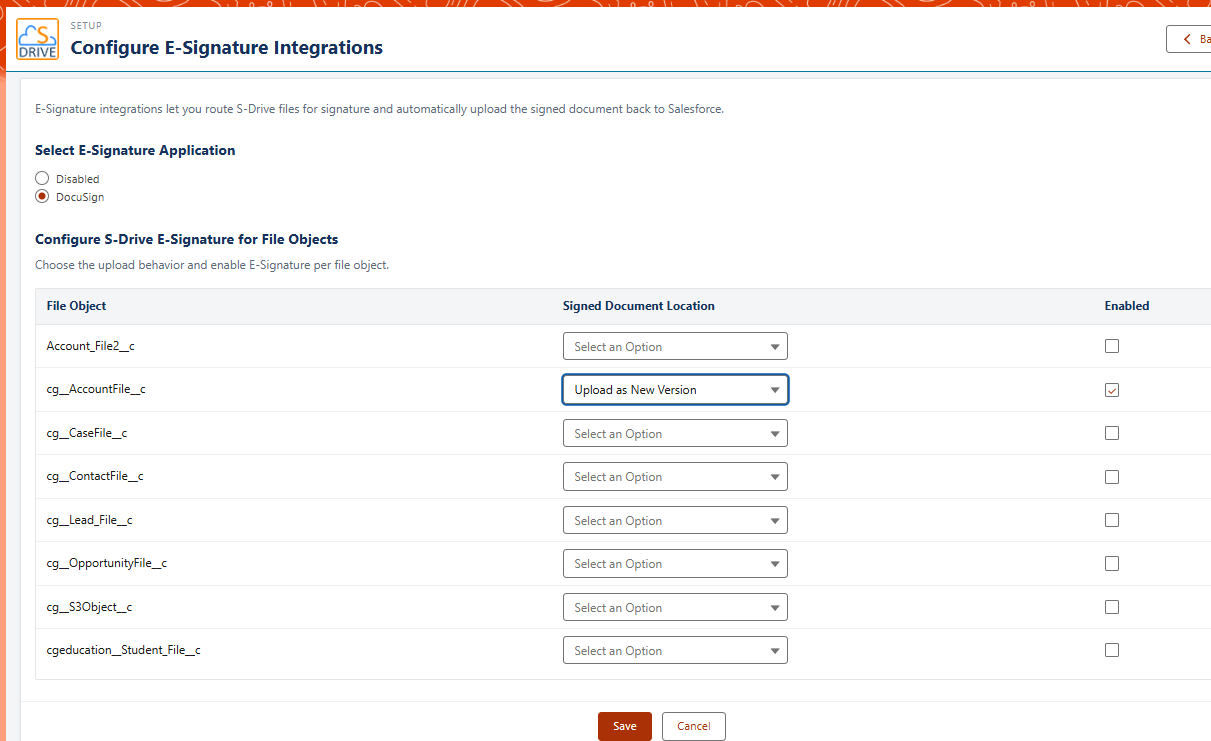
Turn on E-Signature, choose which objects can use it, and choose where signed documents are saved. To learn what E-Signature does, see E-Signature.
Getting here: App Launcher › S-Drive Configuration › Services › E-Signature Integration › Configure
Setup Overview
These are the steps at a glance. Each setting is explained in Settings Details.
-
Open the Configure E-Signature Integrations page (see above).
-
Under Select E-Signature Application, select DocuSign.
-
Under Configure S-Drive E-Signature for File Objects, check the box next to each file object you want to use E-Signature on.
-
For each file object, choose a Signed Document Location.
-
Click Save.
Settings Details
E-Signature Settings
Select E-Signature Application
Disabled Turns off E-Signature.
DocuSign Turns on E-Signature with DocuSign. DocuSign is currently the only provider. Requires DocuSign eSignature for Salesforce to be installed. See Set it up on the feature page.
Configure S-Drive E-Signature for File Objects
File Object E-Signature is available only on the file objects you enable.
Signed Document Location Where the signed document is saved when it comes back from DocuSign. You choose this for each file object.
|
Option |
Saves the signed document |
|---|---|
|
Upload as New Version |
As a new version of the original file. |
|
Upload to Same Directory |
In the same folder as the original file. |
|
Upload to Root Directory |
In the root (home) folder of the record. |
If you choose Upload as New Version, your bucket must be versioned. See Managing Your Buckets for instructions to enable versioning.
Learn about this feature: E-Signature